– Feature Article – Drill Axle Holes with Precision
– Pinewood Derby Car Showcase
– Q&A
Feature Article
Drilling Axle Holes With Precision
By Randy Davis
Excellent wheel alignment is a key factor in creating a competitive pinewood derby car, and using drilled axle holes (instead of slots) is a key way to improve wheel alignment. Of course, this assumes that the axle holes are drilled accurately.
Today’s article will share how to drill accurate axle holes (and some inferior techniques that you want to avoid) with either a hand drill/Pin Vise or a drill press. But before drilling axle holes make sure to check your local rules to make sure they are acceptable for your race.
Drill Bits
The first question that arises with axle holes is, “What drill bit do I use?”1 Generally, to have a snug fit you want to use a bit that is essentially the same size as the axle. The chart below shows typical bits for common kits:
| Kit | Axle Size | Bit |
|---|---|---|
| BSA | 0.086 to 0.087 | #44 – 0.086 |
| PineCar | 0.088 | #43 – 0.089 |
| Awana | 0.092 | 3/32 – 0.938 |
Hand Drill/Pin Vise
To accurately drill axle holes with a hand drill or a Pin Vise you must use a drilling guide. Do not attempt to freehand-drill axle holes – the results will likely be much worse than using the axle slots.
The Pro-Body Tool is a drilling guide designed specifically for drilling axle holes in pinewood derby blocks.
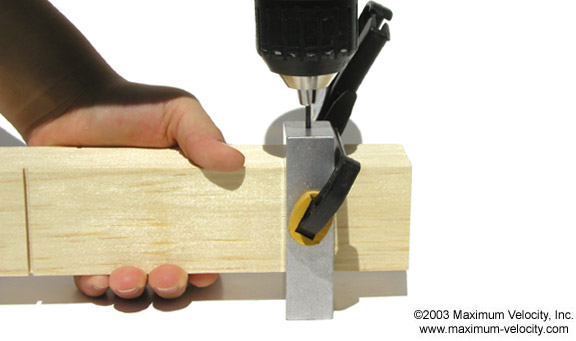
Figure 1 – Pro-Body Tool
It is placed over the bottom of the block, and then clamped into place. The drill bit is then run through the holes in the Pro-Body Tool. The metal of the tool ensures that the drill bit goes straight into the wood. Full instructions for using the Pro-Body Tool can be found on our website, however, here are a few additional tips.
- Keep the drill bit aligned with the hole in the tool. Don’t flex the drill bit – it can break.
- Make sure the Pro-Body Tool fits snugly on the wood. If it is loose, use paper to shim it; if it is too tight sand the sides of the wood block.
- The Pro-Body Tool is equipped with a separate guide hole for drilling a raised hole for one of the front axle.
Drill Press
The Pro-Body Tool is highly accurate, and in some ways is preferable to a drill press. But for more flexibility in hole placement, and for drilling larger quantities of blocks the drill press is a good option.
The principle employed by the Pro-Body Tool is that all holes are referenced to the bottom of the block. Thus, an out of square block will not affect the accuracy of the axle holes.
This same principal must be employed when using a drill press. Thus, when using a drill press, an accurate, vertical fence must be present.2 By pressing the bottom of the block to the vertical fence the holes will be referenced to the bottom of the block, eliminating any issues due to an out of square block.
However, most people with a drill press do not use a vertical fence. Instead, they place the left side of the block on the drill press table and drill the right side holes. Then they flip the block over, and drill the left side holes. This is okay if the block is perfectly square. But if not, the resulting holes will not be parallel to each other, leading to poor alignment. This is shown – in an exaggerated fashion – in Figure 2.

Figure 2 – Inaccurate holes due to out of square blocks
Some people attempt to resolve this issue by using a long drill bit to completely drill through the block. However, since the drill bit is narrow and long, it will flex, leading to inaccurate holes. This is especially true for dense pine such as is found in many BSA kits.
Instead, it is best to use a short bit, and drill half way through the block. As mentioned earlier, issues due to non-square blocks can be resolved by using an accurate vertical fence. The key is to make sure the block is clamped firmly to the fence, even if the side of the block is not flush against the drill press table (see Figure 3).

Figure 3 – Vertical fence creates accurate holes regardless of block shape
Conclusion
Axle holes can mean significant improvements in alignment, however, they must be drilled accurately to provide any benefit.3 So use the proper tools and techniques to make your car go as straight as possible.
1Regardless of the size, cobalt split point bits create more accurate holes than any other type of drill bits. For more information, check out: “Drilling Small Holes” from Volume 11, Issue 2.
2Meaning that the side of the fence is perfectly parallel with the drill bit.
3Maximum Velocity offers pine blocks with accurately drilled axle holes.
Pinewood Derby Car Showcase
1969 Dodge Charger Daytona – Andy Holzer
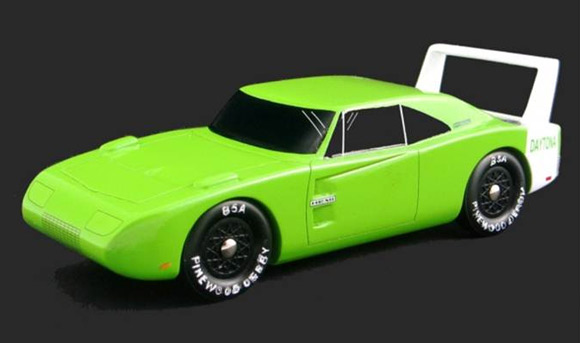
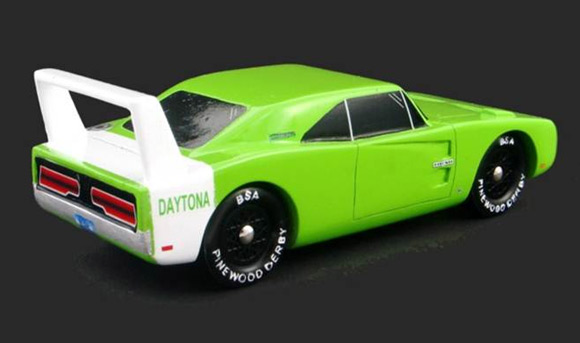
For his 2012 car, my son Noah decided to build one of his favorite cars, a 1969 Dodge Charger Daytona. While we were attempting an alignment we found the dominant front axle hole was not drilled deep enough and we had compromised the hole when removing weight from the bottom. I tried to clean up the hole using the pin vise with a #44 bit, but this did not help. We decided to over bend the dominant front axle and run with it. We got the drift set and were ready to run.
The Charger Daytona was quite fast, but the alignment held it to seventh place in the open race at his old pack. A couple of weeks later we attended a pinewood derby sponsored by a local motorcycle shop. Before the race we took out the bad axle, fixed the axle hole and re-aligned the car. The Daytona placed 3rd in that race. Not a bad car for a five day build!
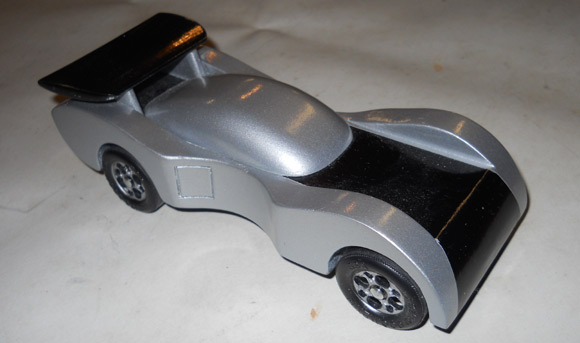
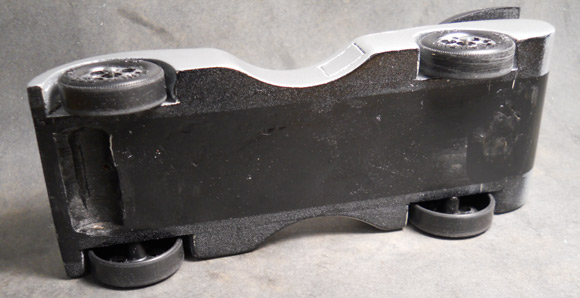
Lil Deuce Coupe – Joe Bowen
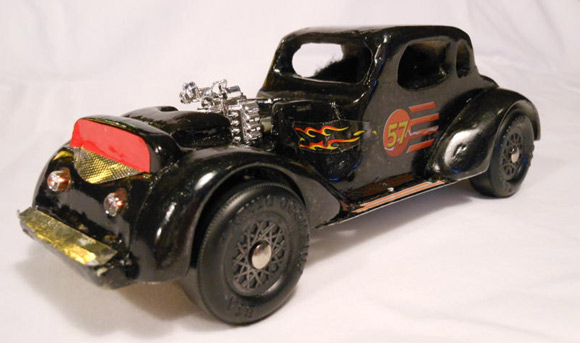
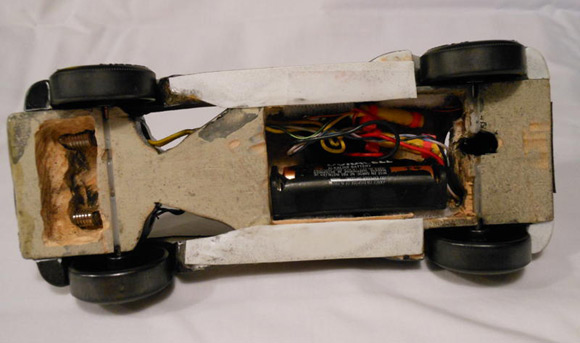
After I had almost completed this car, my son said it would look better with headlights and tail lights. I used a Dremel tool to carve out all the wood possible to squeeze in the wiring, batteries and lights. It won Best Design in the Open Division.
Can-Am Racer – Joseph Baron
On the Can-Am Racer, weight and weight distribution rapidly became a factor with the addition of fenders. So, the car and windscreen were completely hollowed out with a roto-tool, filled with spray-in foam, and then skinned over and painted. The stock wheels were lightened by drilling and then checked for balance and trueness. The car has not raced yet, but following your tips on axles, wheels, lubrication, etc., it should be a winner. We’ll let you know…
Q&A
On the Propeller Car Kit, I was wondering if you tried using two 9V batteries hooked up together to cut charging time?
As long as you connect the two 9V batteries in parallel, charging time would be reduced. Just don’t connect the 9V batteries in series as that would double the voltage to 18V, with unpredictable results. I actually took six D-cell batteries (1.5V each) and hooked them in series (resulting in 9V). This cuts the charging time in half as well.
I am looking at trying my hand at building a ducted fan powered pinewood car. My question is what kind of fan do you use on your kit. The motors that I find have a throttle wire that has to hook to a speed controller. If you are using the three wire setup, how is the third wire wired in order to get the motor to work?
We use a two-wire motor (a brushed motor). Three wire motors are “brushless” and require a speed controller. You can either look on-line to find a two-wire motor, or we can sell you the one that we use.
I think I now understand where to place the weights in reference to the rear axles, but am still a little confused on how high or low the weights should be placed. Should they be as low as possible (closer to the track) or as high as the car design allows or about the middle of the car’s height?
Generally you want the weight to be low on the car. The height of the weight is not as important as the front-to-back placement, but there is a slight effect, so try to get it is as low as possible.
Want Answers?
Do you have a pinewood derby-related question? If so, e-mail us your question.We answer all questions by e-mail, but not every question will appear in the Q&A section of the newsletter.
Back Issues
Are you a new subscriber, or have you missed some of the previous newsletters? Don’t miss out; all of the issues for Volume 5 through Volume 17 are posted on our web site.
Newsletter Contributions
We welcome your contributions. If you would like to contribute an article, a web site review, a speed tip, or a pinewood derby memory, please e-mail us.
Subscription Information
The Pinewood Derby Times is a free e-newsletter focused on pinewood derby racing. It is published biweekly from October through March.
If you haven’t already done so, please forward this issue to your pinewood derby friends. But please don’t subscribe your friends. Let them decide for themselves. Thanks.
If this newsletter was forwarded to you, why not subscribe to receive this newsletter. There is no cost, and your e-mail address is safe, as we never sell or share our distribution list.
To subscribe, send a blank e-mail to
[email protected]
You will receive a confirmation e-mail. Reply to the confirmation e-mail and you will start receiving the Pinewood Derby Times with the next issue.
Randy Davis, Editor, Pinewood Derby Times
E-Mail: [email protected]
(C)2018, Maximum Velocity, Inc. All rights reserved. Please do not reprint or place this newsletter on your web site without explicit permission. However, if you like this newsletter we grant permission, and encourage you to e-mail it to a friend.
Maximum Velocity disclaims any personal loss or liability caused by utilization of any information presented in this newsletter.
The Pinewood Derby Times is not specific to, and is not affiliated with the Boy Scouts of America, YMCA, Awana, or any other organization.
(R)Maximum Velocity is a registered trademark of Maximum Velocity, Inc.
(R)Pinewood Derby is a registered trademarks of the Boys Scouts of America.
(R)Awana is a registered trademark of Awana Clubs International.
All other names are trademarks of their respective owners.