Description
Axle Mounting Accuracy = Greater Speed!
For top speed, axle slots or holes must be absolutely square to the car body and parallel to each other. Unfortunately, the only way to achieve this level of accuracy has been with a drill press - a power tool that is not available to most car builders. But that has all changed. Now anyone can create accurate axle holes and align axle slots with only a hand drill (or a Pin Vise).
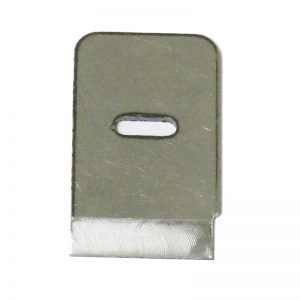
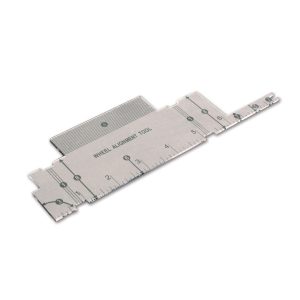
Introducing the Pro-Body Tool, a precision-machined, aluminum device that will improve the speed of your pinewood derby car through accurate axle mounting. The Pro-Body Tool:
- Ensures accurate axle positioning by allowing you to drill precise guide holes into the existing axle slots with a hand drill!(1) The guide holes ensure that the axles are mounted square and true on the car. Improved axle mounting accuracy equals greater speed!
- Serves as a guide for drilling accurate axle holes with a hand drill.(2) Again, improved axle mounting accuracy equals greater speed!
- Equipped with a third hole to easily raise a wheel for faster performance.
When using nail-type axles, the Pro-Body Tool and Pro-Axle Press II work together to make a well-aligned and smooth rolling car.
The Pro-Body Tool for BSA is equipped with a #44 guide hole for use on BSA, PineCar, and other kits with nail type axles. A #44 bit is included.
To use the Pro-Body Tool, follow the instructions included with the kit, or the instructions below. Click on any of the small pictures to view a larger picture.
Phil H. - I just wanted to pass along a Thank You for all your great tools and supplies. My son does very well each year and it's all because of your site. This year was the first year I bought and used the Pro-Body Tool II. In prior years I assumed my (personally) squared block and drill press would provide straight enough axle holes to minimize shimming to align the wheels. However, each year I've had to spend a couple hours with each car and shims to get them to roll straight. This year I used the Pro-Body Tool II and the alignment was almost spot on with the first test run. Ultimately, no shims were needed in either car to get them running straight. I'll never use a drill press to drill axle holes again. I saved several hours this year at what has to be the least enjoyable part of building a car - and just in time, too, as I'm told my little Brownie daughters will be participating in their first Pinewood Derby this year!
(1) A clamp or vise is required to use the tool (not included).
(2) Check your local rules before drilling axle holes.
Pro-Body Tool Usage Instructions
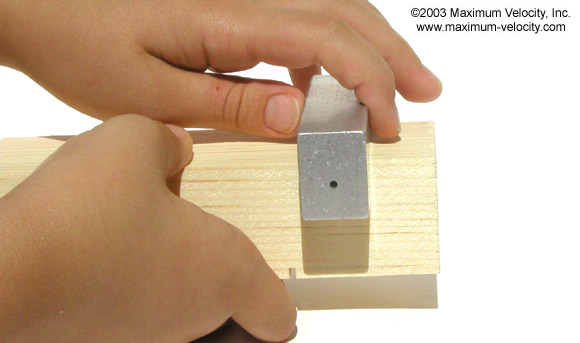
Test Fit
Test Fit
- Test fit the Pro-Body Tool on the bottom of the block with the two ‘ears’ positioned on the sides of the block. If the block is too wide for the tool, use coarse grit sandpaper to reduce the width of the block until the tool fits snuggly onto the block. If the block is too narrow for the tool, insert a piece of paper - folded as many times as needed - between one ear of the tool and the block such that the tool fits snuggly onto the block.

Axle Slots Only:
Mark the Block
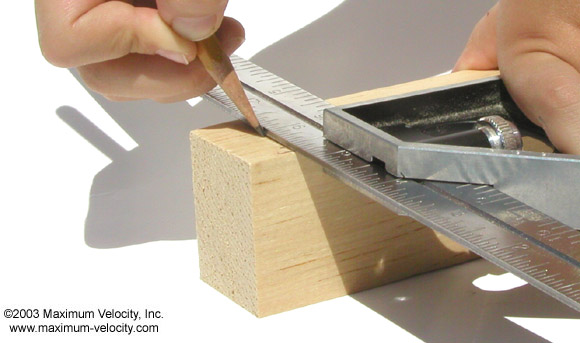
AXLE SLOTS ONLY: Mark the Block
- Use a square to draw a straight line on the side of the car starting at the middle of the axle slot, and extending to the top of the car (or measure the distance from one end of the block to the middle of an axle slot and transfer that measurement to the top-side of the block. Then use a ruler to draw a line from that measurement to the center of the axle slot).
- Repeat step 2 for the other slot. Then continue with step 4.
Axle Holes Only:
Mark the Block
AXLE HOLES ONLY: Mark the Block
- Measure and mark the desired position of the new axle holes on the side of the block. Extend the mark from the bottom of the block to the top of the block using a square (or measure and mark near the bottom of the block and near the top of the block, and then join the line with a pencil and ruler). Holes for extended wheelbases are typically positioned 11/16 inch from each end of the block.
- Repeat step 2 for the other end of the block. Then continue with step 4.
Clamp Tool
Drill
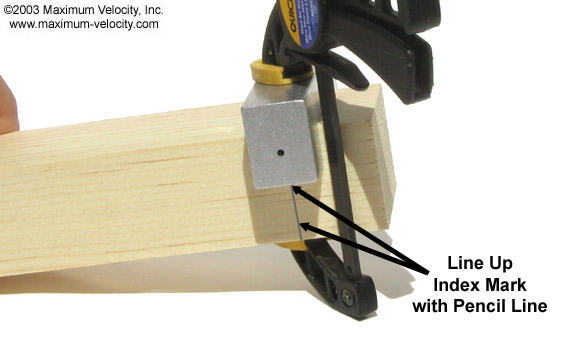
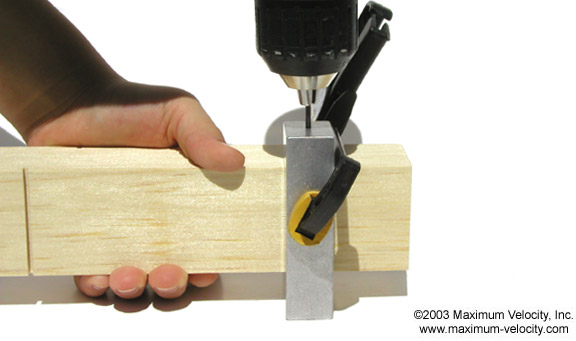
Clamp Tool and Drill
- Position the tool on the bottom of the car with the two ‘ears’ on the sides of the block. Align the index mark with the line on the block. Clamp the tool in place, using paper if necessary to ensure a snug fit (see step 1).
- Hold the block firmly, position the drill bit in the hole, and drill 3/4 inch into the block.
- Without releasing the clamp, turn the tool and block over, and drill the second hole.
- Repeat steps 4 to 6 for the other two holes (or one hole if you will be making a raised hole).
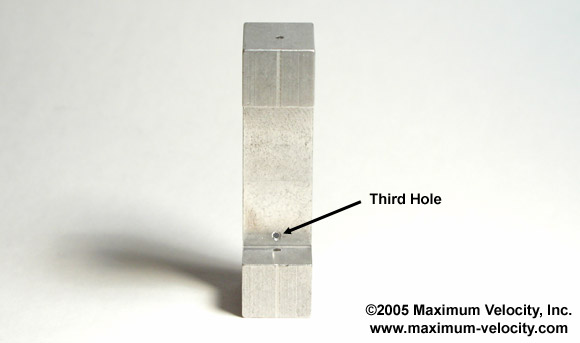
Third Hole
Raised Hole
- Transfer the line on the side of the block to the bottom of the block.
- Position the tool on the desired side of the block, and align the index mark on the tool with the line on the bottom of the block. Make sure that the third hole on the tool is positioned near the bottom of the block.
- Clamp the tool in place and drill the raised hole.