– Feature Article – Rail-Riding: Getting that Extra Speed
– Humor
– Pinewood Derby Car Showcase
– Q&A
Feature Article
Rail-Riding – Getting that Extra Speed
By Randy Davis
If you have spent any time on the Internet researching pinewood derby racing, you will have ran across the term “rail-riding”. This alignment technique had been used for many years by a select few, but became popular around 2008.1 The Pro-Rail Rider Tool, the Pro-Axle Bender and other tools were introduced soon after to facilitate the implementation of this technique.
But with all of the tools, videos, and documentation available, I still get many calls from confused car builders about rail-riding. Therefore, the intent of today’s article is to organize the many facets of rail-riding in such a way that clarity can be attained.
What Is Rail Riding
When a pinewood derby car rolls down the track, it will contact the center guide rail.2 Each time a wheel contacts the rail, some performance will be lost. Moreover, when a rear wheel contacts the rail, even more performance is lost since the rear wheels carry the majority of the car’s weight.
So, the fastest car (all other factors being equal) is one that never touches a guide rail. It would seem then that setting the cars alignment to go straight would be the best bet. This might work if the track was perfectly smooth and level, but we all know that is a pipe dream. All tracks will lean one way or another (and some lean both ways alternately by track section). So, a car that is set to run straight will follow the lean of the track, resulting in contact with one or both wheels on one side of the car.3 In addition, if the car is a three-wheeler (with a raised, non-spinning wheel) and the raised wheel contacts the rail, the advantage of the raised wheel is lost.
How can we compensate for this? Recognizing that the least amount of loss occurs when the lightest loaded wheel (a front wheel) contacts a rail, if we could set the car’s alignment so that a dominant front wheel is the only wheel that contacts the rail (the non-raised wheel for three-wheel cars; your choice of wheels for a four-wheel car), we would achieve the least guide rail losses. This is the basis of rail- riding.
Advantages To Rail-Riding
Before we get into implementation and other considerations, let’s identify the advantages of rail-riding.
- For 3-wheel cars, the raised wheel stays static, which maintains the advantage of raising a wheel.
- The heavily loaded rear wheels stay off the rail, minimizing guide rail losses.
- Since the car follows the guide rail, it maintains the straightest possible path down the track (as opposed to zigzagging back and forth along the guide rail – a longer path down the track).
- On cars that have a very aggressive balance point, sometimes the front wheel is too lightly loaded to steer the car. The car begins rear wheel steering, and rapidly zigzags back and forth along the guide rail (the “death rattle”). By maintaining contact between the front dominant wheel and the guide rail the risk of a death rattle is minimized.
Implementing Rail-Riding
As described above, the basics of rail-riding is having the front dominant wheel follow the rail. However there are other rail-riding relating techniques that can be added to further improve performance. Let’s start with the basics, and then describe these additional techniques.
Adjusting the Steering
First, the front dominant wheel must be adjusted so that it steers the car towards the guide rail (thus steering the non-dominant front wheel away from the guide rail). The steering adjustment is accomplished by putting a very slight bend in the dominant front axle and then rotating that axle until the car steers as desired. Here is a step by step procedure.
-
- Create a test Board
A test board is basically a particle board or MDF shelf, eight feet long by 1-1/2 to 2 feet wide. The board is propped up on one end about 3 to 4 inches (a 2×4 works well), and a pillow is placed at the downhill end. A line is struck down the center of the board, and the board is leveled side to side by rolling a ball (billiard ball, racquetball or large marble) down the track. Use shims of wood or paper to level the board so that the ball follows the center-line.
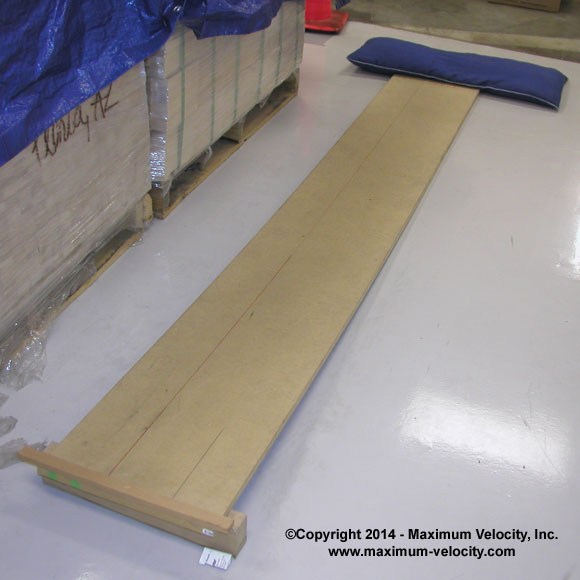
Figure 1 – Typical Test Board
- Create a test Board
- Bend the front dominant axle
Before inserting the axle into the car, place a 1.5 degree bend in the dominant front axle using a Pro-Rail Rider Tool or a Pro-Axle Bender. Slide the wheel onto the axle and lubricate thoroughly. Then install the wheel/axle onto the car with the bend up or down (see “Other Considerations” below). - Test and adjust
Place the car at the uphill end of the test board and align the edge of the car with the center line (actually I found it is best to make a new line towards the side of the board opposite the desired direction of the car). Make sure to place the car exactly even with the line for each test – a slight difference in placement will make a big difference in accuracy. Let the car roll and note the amount and direction of the drift. Slightly rotate the axle by grasping the axle head with a pair of Axle Extraction Pliers and retest. Continue testing and adjusting until the car has a drift of 5 inches over 8 feet, drifting towards the non-dominant wheel.
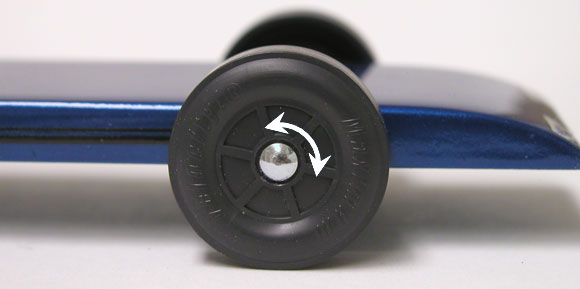
Figure 2 – Adjust Steering By Rotating Dominant Axle
The car will now rail-ride. You can stop at this point, or continue with the next step.
Wide Gapped Rear Wheels
The front dominant wheel is gapped at the typical .030-.035 inches, but the rear wheels can be gapped wider. This can help ensure that the rear wheels stay away from the guide rail. Typically, the rear wheels are double-gapped to .060-.070 inches.
Narrowed Front
The front dominant side of the car can be narrowed by 1/16 inch. This insets the front dominant wheel to ensure that it contacts the guide rail before the corresponding rear wheel.
Figure 3 – Narrow Front and Double-Gapped Rear
Rear Axle Angle4
To ensure that the rear wheels stay off the rail, the rear axles can be angled upward. This causes the wheels to stay on the axle heads, and away from the rail. Angled rear axles can be implemented by either drilling axle holes at an angle, or by putting a slight bend into the axles (usually 2.5 degrees). Make sure that the top of the wheels don’t make contact with the sides of the car.
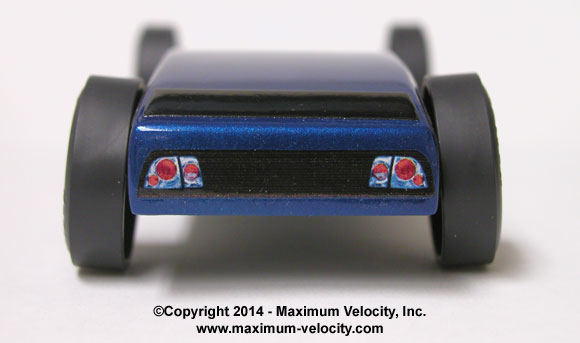
Figure 4 – Rear Angled Axles
There are pros and cons to both methods:
- If axle holes are drilled, they must be drilled accurately. Next, if the front dominant wheel is angled downward, then the rear wheels will be slightly toed-in resulting in binding friction. So, with angled rear holes, angle the front dominant wheel upward (same direction as the rear wheels).
- If axles are bent, then the rear wheels must be aligned to each other. This is done by rolling the car back and forth and watching the movement of the wheels – in and out. The wheels should stay on the axle heads regardless of the direction of the car. If a wheel moves towards the car body, the axle head must be slightly rotated to correct the problem.
Other Considerations
There are several other considerations that affect rail-riding.
Weight and Lube
Before doing any alignment testing on the car make sure the car is at full race weight and is fully lubed. Any alignment adjustments that are made on a light weight or non-lubed car will be in vain.
Grooved vs Non-Grooved axles
Grooved axles can cause issues if they are bent for alignment purposes (edge of wheel hub could get caught in a groove). So generally, it is best to use non-grooved axles for bending.
Four Wheels on the Ground
The above discussion is based on a car with a raised front wheel. But many races require four wheels on the ground. Rail-riding can be implemented on a four-wheeled car, but it is a bit trickier, as both front axles must be equally bent and then equally adjusted so that they work in harmony with each other.
Downward or Upward Angle on Front Dominant Axle
Generally, best performance is achieved when the front dominant axle is bent downwards. This is because the amount of contact with the guide rail is less with a downward bending, and in fact, the wheel essentially rolls on the guide rail in this configuration (with an upward angled axle, the wheel scrapes on the guide rail in two places). Note however, that there is some additional friction introduced where the wheel hub contacts the car body.
Figure 5 – Up or Down Angle on Front Wheel
(Wheel angle is exaggerated)
K-House Groove for Rotating Axle5
Instead of using Axle Pliers to rotate the axle, a slot can be cut into the axle head to accept a flat-blade screwdriver. The screwdriver can then be used to rotate the axle. Just make sure to put a gap gauge between the inner wheel hub and car body when making adjustments, otherwise the screwdriver will tend to reduce the gap.
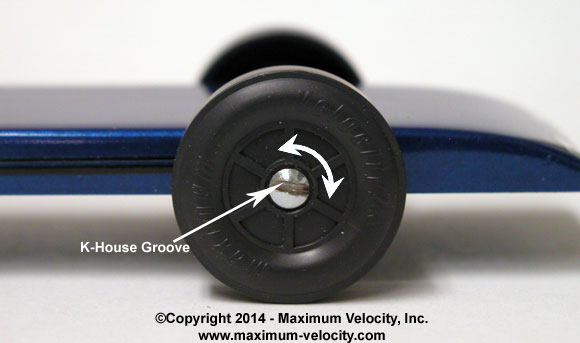
Figure 6 – K-House Groove
Gluing the Axles in Place
Once all of the adjustments are made you want to ensure that the axles don’t move. If you have axle slots, then you just place glue in the slots. But if you use axle holes, then you certainly don’t want to remove the axles to insert glue, as you would have to start the alignment process all over again. The solution is to have pre-drilled four access holes on the bottom of the car, such that the axle tips are exposed. Glue can then be placed into the access holes, locking the axles in place. I recommend 3/16 inch holes.
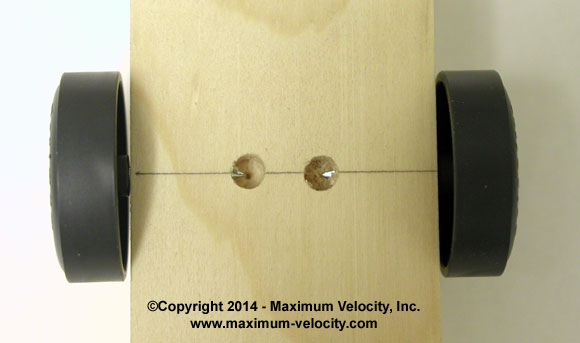
Figure 7 – Gluing Axles in Place
Conclusion
Rail-riding is a key method for improving the performance of your pinewood derby car. Hopefully, I have cleared up some of the mystery and confusion surrounding rail-riding, and I hope you will give rail- riding a shot on your next pinewood derby car.
1The term “RAILRIDER” is a registered trademark of Warp Speed Derby Inc. and DerbyWorx Inc.
2This article assumes the target track has a center guide rail (car straddles the rail). The information does not apply to tracks with side guides.
3Have you ever seen a “magic car”, i.e., a car that is thrown together at this last minute and looks like it should be a real dud but ends up very fast? I believe in most cases, these cars are only “magic” because they happen to avoid the guide rail, resulting in outstanding performance. I was fortunate enough to build one of these several years ago.
4In a future article, I will go into more detail about the trade- off between bending the rear axles and drilling angled holes.
6The K-House Groove is named for the person who popularized this technique.
Humor
The couple was delighted when their long wait to adopt a baby came to an end. The adoption center called and told them that there was a wonderful Russian baby boy available. The couple accepted him without hesitation.
On the way home from the adoption center, they stopped by the local college so they each could enroll in night courses.
After they filled out the forms, the registration clerk inquired, “What ever possessed you to study Russian?”
The couple said proudly, “We just adopted a Russian baby. In a year or so, when he begins to talk, we want to be able to understand him.”
Pinewood Derby Car Showcase
Iron Man – Randy Davis
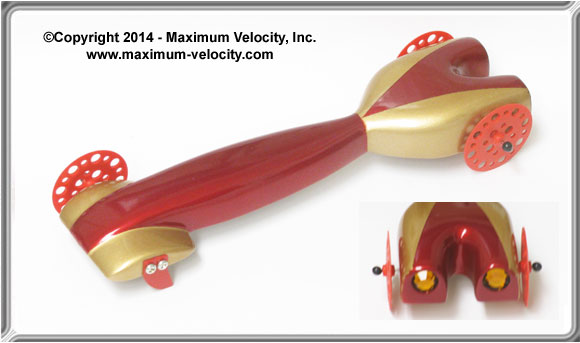
I built this car as a prototype for a CNC machined car, but the shop I was going to use closed down. Oh well. I still had the prototype, so I entered it in our local Outlaw race and it took 1st Place in speed and 3rd Place in design. I used some X-Lite Outlaw wheels that were machined from Turcite-X. The wheel color doesn’t really match the car color, but the wheels certainly draw attention to the car.
Olaf – Richard Larson
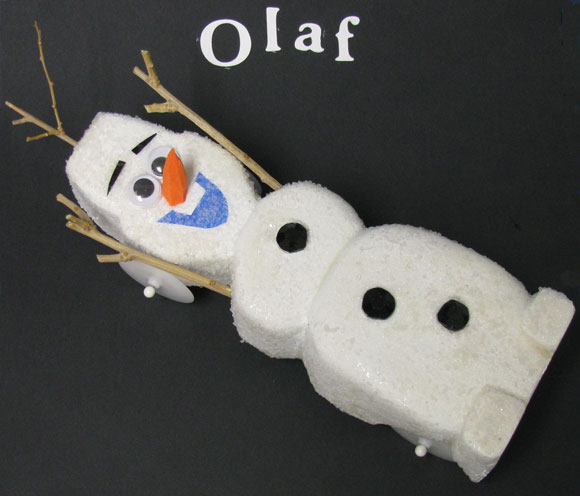
Olaf (the snowman in Frozen) ran in our local race as well, and took 2nd Place for speed and design. It was primed in white, then white glue and glitter was mixed together and brushed over the primer.
Every year, Richard builds great looking cars. Here are links to a few of his previous cars:

Mater
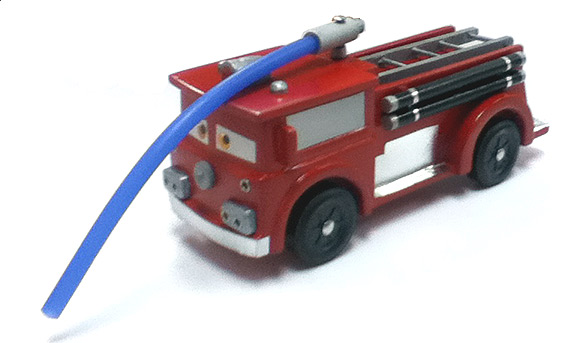
Red
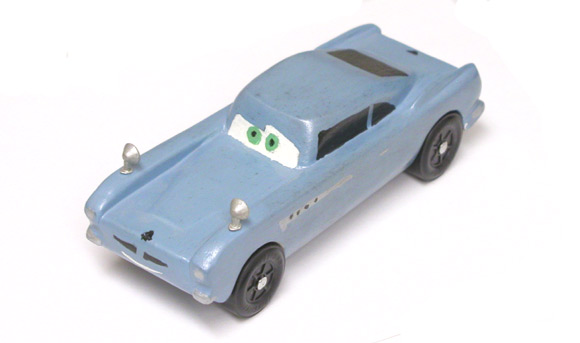
Finn McMissile
Q&A
In a recent article you said “if a car has a balance point that is too aggressive for the track …” What do you mean by too aggressive? Is the center of gravity closer or farther from the rear axle? I am assuming closer, but I believed that I observed the “death rattle” in last year’s race. The car’s weights were on the underside just toward the back of center. This to me would put the COG significantly in front of the rear axle, likely more than 1.25 inches.
By too aggressive, I mean that the balance point is too close to the rear axle.
I am not sure what the situation was with the car you saw. From your description, it is unlikely that the balance point was too aggressive. Similar behavior can result from misaligned wheels, especially a rear wheel. If one or more rear wheels are misaligned, the car will tend to wander back and forth along the guide rail.
If my intention is to dig/drill out behind and in front of the rear axle, how would I find the center of mass? Isn’t it too late to try and achieve a center of mass (say 1 inch) after making weight pockets?
The balance point is determined by placing the car on the edge of a balance stand or ruler, then measuring from the rear axle to the point at which it balances. If you can lay the car upside down on the balance stand, then you can place the required weight (without gluing it) then shift if as needed. If you cannot lay the car upside down, then place the weight (no glue) and place duct tape or clear packing tape over the cavities to hold the weight in. Check the balance point. Then remove the tape, adjust, retape, try again, etc.
Make sure to temporarily install the wheels and axles when measuring the balance point. They have a big effect on the balance point.
It is possible that you cannot achieve the desired balance point with the weight pockets you have. If you cannot, then you can try to enlarge the pocket behind the rear axle (to hold more weight), or remove wood from in front of the rear axles.
Want Answers?
Do you have a pinewood derby-related question? If so, e-mail us your question.We answer all questions by e-mail, but not every question will appear in the Q&A section of the newsletter.
Back Issues
Are you a new subscriber, or have you missed some of the previous newsletters? Don’t miss out; all of the issues for Volume 5 through Volume 17 are posted on our web site.
Newsletter Contributions
We welcome your contributions. If you would like to contribute an article, a web site review, a speed tip, or a pinewood derby memory, please e-mail us.
Subscription Information
The Pinewood Derby Times is a free e-newsletter focused on pinewood derby racing. It is published biweekly from October through March.
If you haven’t already done so, please forward this issue to your pinewood derby friends. But please don’t subscribe your friends. Let them decide for themselves. Thanks.
If this newsletter was forwarded to you, why not subscribe to receive this newsletter. There is no cost, and your e-mail address is safe, as we never sell or share our distribution list.
To subscribe, send a blank e-mail to
[email protected]
You will receive a confirmation e-mail. Reply to the confirmation e-mail and you will start receiving the Pinewood Derby Times with the next issue.
Randy Davis, Editor, Pinewood Derby Times
E-Mail: [email protected]
(C)2018, Maximum Velocity, Inc. All rights reserved. Please do not reprint or place this newsletter on your web site without explicit permission. However, if you like this newsletter we grant permission, and encourage you to e-mail it to a friend.
Maximum Velocity disclaims any personal loss or liability caused by utilization of any information presented in this newsletter.
The Pinewood Derby Times is not specific to, and is not affiliated with the Boy Scouts of America, YMCA, Awana, or any other organization.
(R)Maximum Velocity is a registered trademark of Maximum Velocity, Inc.
(R)Pinewood Derby is a registered trademarks of the Boys Scouts of America.
(R)Awana is a registered trademark of Awana Clubs International.
All other names are trademarks of their respective owners.