Description
Wheel Accuracy = Greater Speed!
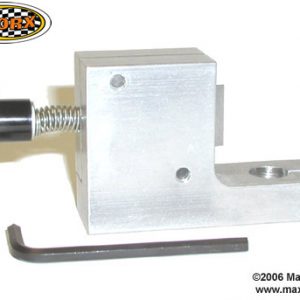
The Pro-Hub Tool is a precision machined instrument that will improve the speed of your pinewood derby car by performing three important wheel preparation procedures:
- Hub Squaring - The Pro-Hub Tool ensures accurate rotation by squaring the wheel hub to the wheel bore. Improved wheel accuracy equals greater speed! Perform Hub Squaring after Bore Reaming and before any other wheel preparation steps.
- Hub Coning - The Pro-Hub Tool reduces the braking effect of the wheel hub against the car body by accurately and easily coning the inside wheel hub. Perform Hub Coning after all other wheel preparation steps. Check your local rules to ensure that wheel hub coning is allowed in your local race.
- Bore Reaming - Some wheels are manufactured with a wheel bore that is too small to fit a Wheel Mandrel. The Pro-Hub Tool ensures proper axle fit by reaming undersized wheel bores (great for wheels that don't fit on the mandrel!). Perform Bore Reaming before any other wheel preparation steps.
The tool has been tested on wheels from BSA, Awana, MV, and PineCar kits. It is shipped complete with coarse and fine grit sandpaper (220 and 600 grit), and instructions.
To use the Pro-Hub Tool, follow the instructions below. Click on any of the small pictures to view a larger picture.
Pro-Hub Tool Usage Instructions
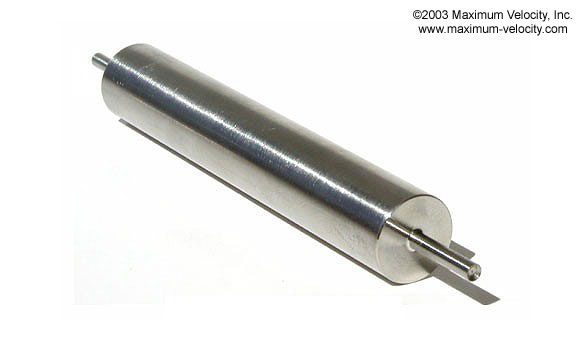
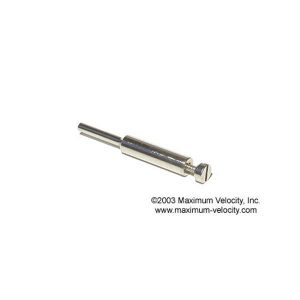
Square End
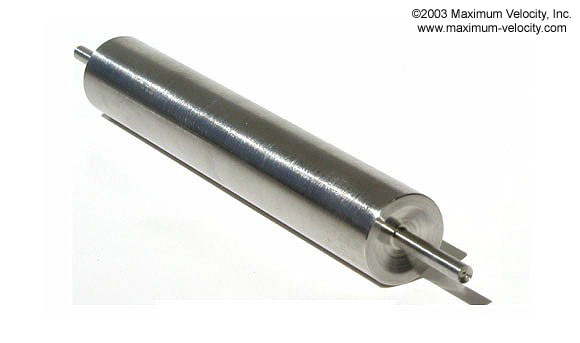
Coned End
Identify the Tool Ends
- The 'Square End' of the tool is used to square the wheel hubs, while the 'Coned End' is used to cone the wheel hubs. Either end of the tool may be used to ream the wheel bore.
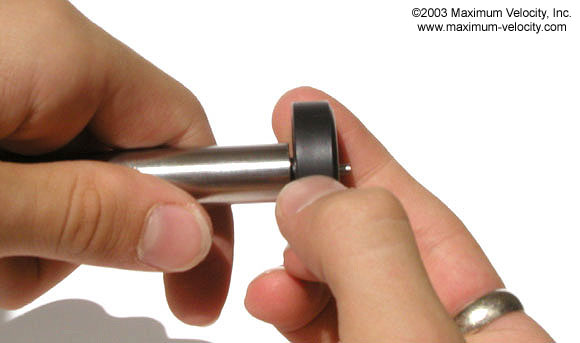
Test and Ream
Test and Ream
- Remove the protective cap from the 'Square End' of the tool and test fit each wheel by sliding it onto a tool pin. If the wheel is too narrow for the tool, use steady hand pressure and a twisting motion to work the wheel on to the tool. Then remove the wheel and repeat three times on the same wheel.

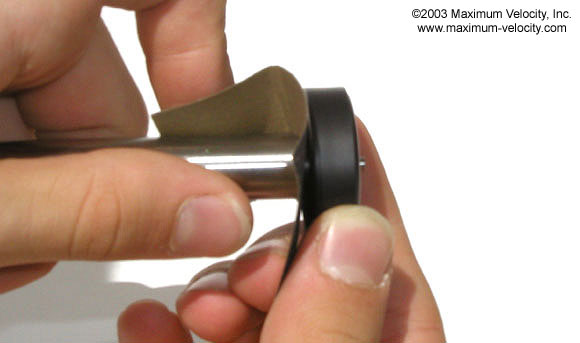
Mount Sandpaper
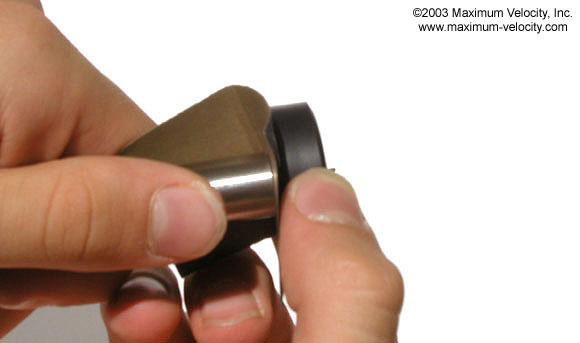
Square the Hub
Square the Hubs
- Dip the coarse-grit sandpaper in a cup of tap water. On the 'Square End' of the tool, with a twisting motion pierce the sandpaper (grit facing outwards). Slide the sandpaper until it contacts the body of the tool.
- Place a wheel onto the 'Square End' of the tool, hub side first. With one hand hold the tool and the sandpaper, and with the other hand press the wheel against the sandpaper. Rotate the wheel back and forth for about 10 seconds. Make sure to keep the protective cap on the 'Coned End' of the tool.
- Repeat steps 3 and 4 for the other wheels, using a new area of the sandpaper for each wheel.
- If the hubs will not be coned, repeat steps 3 to 5 with the fine-grit sandpaper.
Cone the Hub
Hub Coning
- Replace the protective cap on the 'Square End' of the tool, and remove the protective cap from the 'Coned End' of the tool.
- Perform steps 3 to 5 above using the 'Coned End' of the tool.
- Repeat 3 to 5 using the fine-grit sandpaper and the 'Coned End' of the tool.
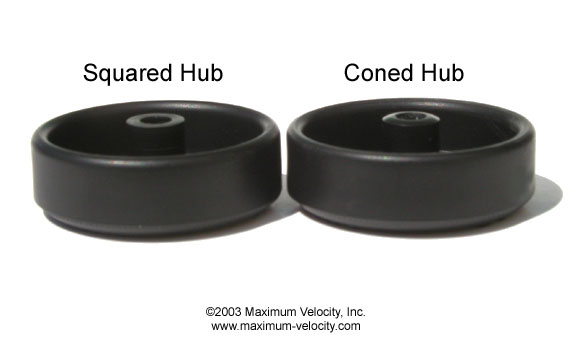
Coning - Before & After
Storage
- Replace the protective caps before storing in a dry location. If the tool must be stored where it will be subjected to humidity, coat the tool with a thin layer of protective oil, and seal it in a plastic bag.